Showing posts with label Die-cut. Show all posts

Monday, December 1, 2014

Mixed Media Card Challenge - Home (Lace Optional)


I love this sentiment stamp from MFT, and knew I wanted to use it as soon as I saw this months theme for the Mixed Media Card Challenge was "Home". The shaker box card was created using white cardstock oversprayed with Heidi Swapp Gold, filled with a combination of Ruby Rock-It Snow White coarse glitter and red hearts inside the shaker. I love that when you stand the card upright, all the little hearst and snow disappears behind the Memory Box Countryside die cut, so all the hearts do come "home" for Christmas! The MFT sentiment is stamped in gold and embossed in gold, and I love the little detail the Lil Inkers Stitched Circle die-cuts add.


Hope you get to play along, I can't wait to see what you create!

The Design Team have some FABULOUS creations to inspire you!
Play along til December 25th, Christmas Day!!!


Also playing along with 
Adicted to CAS Dots (with their FABULOUS DT call too) 
Kylie's Christmas Card Challenge
City Crafter Techniques Challenge
with my Shaker - a favourite technique at the moment!

Monday, October 13, 2014

CAS(E) this Festive Friday...

Had a play with some crafty friends yesterday - although there was more laughing and chatting than crafting me thinks! This is one of the two Christmas cards I managed to add to my collection. Inspired by this gorgeous Festive Friday inspiration photo and CAS(E) this Sketch. Created using Paper Smooches Christmas dies and Memory Box Pine Needle border, with papers from Echo Park and Basic Grey. 

Playing along with Virginia's View CAS Challenge too!

Sunday, October 20, 2013

A Little Trigger...

Playing along with this fortnights Moxie Fab Tuesday Trigger, I knew I wanted to use this gorgeous WPlus9 Background Builders - Knit, but had no idea what would happen from there!  I stamped the background by repeatedly inking up the stamp with Hero Arts Red Royal and Orange Soda at opposite ends and layering Bubblegum Pink in the middle.  I had a leftover Memory Box Gorgeous Gardenia Outline in white from this card I made yesterday, and paired this with a piece of MME Cut & Paste ombre paper I had previously overstamped using Avery Elle All Squared Up in Hero Arts Tidal Pool for the flower background, and leaves.  I thought about adding a sentiment, but figured it had enough going on already!
Tuesday Trigger: Apache Tears in the Key of Autumn

Saturday, August 10, 2013

It's a Good Day for FUSION...


I can't wait to see how you are inspired by this fortnights' fabulous FUSION!!!  

Are you like me, and have put off giving the chalkboard technique a whirl???  Something about trying to mess us your white stamping on black seems, well, just WRONG!?!  But it's so FUN!!!  Inspired by this fortnights FUSION photo and sketch, I stamped this fabulous My Favorite Things sentiment in Versamark Watermark ink and heat embossed in Seafoam White. Using Hero Arts White ink, I smeared a little on my finger and rubbed it across the embossing - almost like I was trying to rub it off with an eraser, then to add a bit more interest I swiped the edges of the diecut panel with the ink pad.  I thought this burlap tied in nicely with the string around the pile of erasers from the inspiration photo!  I have to admit, purple is not up there with my favourite colours, but I was quite partial to this gorgeous handmade flower, and paired it with some matching skeleton leaves, also found lurking in the bottom of my stash!

Here's how you can play along...
PROCEDURES:
1. Play with just the sketch challenge.
2. Play with just the inspiration photo challenge.
3. Or you can create FUSION by combining BOTH challenges into one card.
4. Use the challenge graphic and link back to Fusion in your post.
5. Please read the other considerations on the Experiment Page before playing along.

Hope to see you at the FUSION Challenge Blog soon, in the meantime, here's some more FABULOUS inspiration from the Design Team...


Playing along with this weeks The Pink Elephant Texture Challenge too

Seeing as I finally took the plunge and created using this purple colour combo, 
thought I'd better link up to Summer Camp Week 3 Homework too!

Monday, April 22, 2013

Congratulations on Your New Addition...

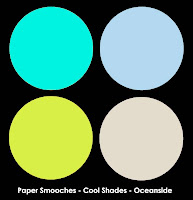
I couldn't resist this combination of Paper Smooches Sparks Cool Shades Challenge, and this fab Retro Sketch by Deanna.  I thought these Cool Shades would be perfect for a baby boy card.  I fell in love with this teal  American Crafts 5th Avenue paper, with images of houses and "home is where the heart is", "at home" and "happy little life" sentiments scattered on the paper, so combined we have "Congratulations on Your New Addition"!  Featuring this gorgeous mama and baby elephant from Paper Smooches A Little Lovin' and sentiment from Sentiment Sampler, together with papers from American Crafts, with the corrugated kraft card left over from some recycled packaging, all tied together with some Trendy Twine in baby blue.


Wednesday, April 10, 2013

A Friendly FUSION...

Amazing to see all the cards in the FUSION gallery so far!  Don't forget there's still a few hours to post before you vote for this weeks inaugural FUSION challenge.
I decided to play on a theme from my original post FUSION post, and recreated my tri-colour chevrons in Squeezed Lemonade, Spiced Marmalade and Pickled Raspberry Distressed inks using an extra blast of Glimmermist Gold this time, before die-cutting my chevrons and stamping Paper Smooches flowers from the  left over watercolour paper.  I stamped the Paper Smooches sentiment in Versamark Watermark and heat embossed in Zing White, pop-dotted and added Kaisercraft pearls for extra sparkle.

Playing along with CASual Fridays Chevrons & Flowers,  Addicted to CAS Friend Challenge  and Paper Smooches Be Our Guest Designer Challenge too.


Thursday, April 4, 2013

A Crafty Dash Towards Spring...

Well maybe in the northern hemisphere, but not quite here!  

This fortnights 10 Minute Craft Dash colours reminded me of Spring, so I kept my Dash card super simple, with a gorgeous Memory Box branch die cut from mint paper and added these three fabric flowers from my stash, die cut my Paper Smooches love sentiment from cardstock, and pop dotted over Crate Paper timber textured pattern paper, and voila - 8 minutes 17 seconds this week - and I didn't have to panic about stamping my sentiment this time LOL!

With this fabulous Gossamer Blue kit up for grabs, 
why don't you give the 10 Minute Craft Dash a try!

Also playing along with Addicted to CAS Spring Challenge, and 

Friday, March 8, 2013

Pinkspired...


This fortnights Pinspired Challenge is sponsored by the Sweet Stamp Shop, so I knew I had to join in the fun.  Inspired by the gorgeous dark timbers, flashes of green, large typeface, and Happy theme, I stumbled upon this paper from Simon Says Stamp which I thought would provide a perfect base for my card.  I added alpha stamps from Websters and a die cut rose from Spellbinders, with My Favorite Thing leaves and voila!


Thought the colours were perfect to join in this weeks City Crafter Shades of Pink Challenge


City Crafter Challenge
Wishing you a HAPPY DAY too!

Friday, January 11, 2013

You give my heart wings...


When I thought about being brave and putting my name forward for the 10 Minute Craft Dash Design Team Call, I realised that even though I have participated a number of times, more often than not I had stretched the 10 minute deadline.  So I thought I'd get in some more practice, and luckily this one came in at 9 minutes 25 seconds, although it almost missed out on the buttons as they kept wanting to stick to each other rather than the card LOL!

I do love my "Ginghnam Style" chicken from Purple Onion stamps, and as I am in the midst of clearing up my crafting space, he was handy, so it was an easy choice.  I thought I'd make a real feature of his heart wing, perfect for this weeks The Paper Players Love is in the Air Challenge, together with some fabulous inspiration from the gorgeous colours and chevrons from this weeks Stampin' Royalty photo and Jen's versatile Freshly Made Sketch, I was ready to create.

Some tips for a quicker card:  As I knew I was going to be pressed for time, and my L'il Inkers photo frame die cut was fresh from Santa, I thought I'd run it through my Cuttlebug with some plain cardstock first for a test run.  Very impressed with the fact that in one roll it came out clean and the cut frame fell out, without me having to wrestle with it at all - and the bonus was I now had a template to work out my framing of the stamp, and to practice writing my sentiment! 
If you use papers with a a straight line pattern, it's much easier and quicker to cut and adhere in straight lines too :)

Just a general tip for using chevron paper, if you want the pattern to look like arrows pointing upward, rather than down, as I did, then just make sure the arrows on both side edges of your card are pointing upward - it works!
 
 
Only a couple more days to go!


Saturday, May 12, 2012

There She Goes MOABH...

Welcome to the 3rd annual Mother of All Blog Hops sponsored by There She Goes Clear Stamps!   Over the next two days, we (customers and trendsetters!) will be featuring some of our favorite There She Goes Clear Stamp sets!   Not only that, we’re going to give YOU a chance to win some fabulous prizes!  To find out how, please go to the There She Goes’ blog.


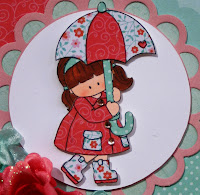
So glad you can join me today as I have the pleasure of showcasing the versatile There She Goes Under the Weather, a fab set of gorgeous spring-filled stamps by Melyssa Connolly with whimsical images, borders and sentiments.  My card is inspired by TSG Design Team member Karen Giron's Sunday Sketch.  The gorgeous girl and her umbrella have been paper pieced with a mix of papers from Heidi Swapp, Kaisercraft and Echo Park, highlighted with Prima flowers and bling buttons :)

The image and sentiment are just a a small sample from the Under the Weather set.  I just LOVE the versatility of this set, I have crafted a few other cards using this set recently, and the details can be seen here and here.


Please click on the InLinkz below and follow it to the next blog! Thanks for dropping by!!!