Wednesday, September 25, 2013

Seize the FUSION...


Rummaging through my stash I re-discovered these funky retro Bo Bunny Alora Collection papers.  How perfect are they for this fortnights FUSION colour combo! And I love that the swirls remind me of steaming hot coffee!

Took the colours and theme from this fortnights fabulous FUSION graphic, combined with the current Seize the Sketch to create this friendship card.  The up-cycled strip of corrugated packaging reminds me of takeaway coffee cups. Papers are a combination of Bo Bunny Alora Collection, Kaisercraft and Basic Grey, with the coffee girl and sentiment from My Favourite Things, and the coffee cup splatter from Skipping Stones stamped using Hero Arts Cup O' Joe (of course!!!)

 Remember you have another week to play along with FUSION - 
hope you can drop by for a cuppa and join in the fun!

Joining in the fun at Little Red Wagon Back in Time Challenge too.

Tuesday, September 24, 2013

Shakin' all Over and Fallin' for You...

ETA. I think this card fits perfectly with this weeks 
You can play along til October 27th!


Thought I'd turn this weeks CAS(E) this Sketch into an Fall (Autumn!) leaf shaker card and play along with CASual Fridays Fall Colours & a Leaf, and CASolgy Autumn too.  The leaves were created by spraying a sheet of watercolour paper with water and a combination of red, orange, yellow, gold & brown mists. Once this was dry, the sheet was stamped with The Alley Way Stamps It's Fall About You leaf and fussy cut - the best leaves had more than one colour on them.  The shaker was created by die cutting with Lil Inkers Stitched Rectangle mats and edging the back of this with two layers of foam tape, sandwiching a spare piece of clear plastic packaging between the back of the cardstock and the first layer of foam tape.  Dropping in a handful of leaves, and sealing up the shaker against the front of the card.  The sentiment was created using Paper Smooches Graffiti, Alphadot and Nutty for You sentiment, stamped in Cup O' Joe on a fishtail flag diecut.


Monday, September 23, 2013

A Little More Sunshine...


Playing along with Curtain Call Sunflower Surprise and this weeks fabulous MUSE.  I had fun using this gorgeous gerbera flower and leaves stamps from Uniko Studio again, stamped in Hero Arts Cup O' Joe on Bo Bunny Forever Fall paper and fussy cut. Reflecting the variations in colour in the MUSE card background, the background paper is also from Bo Bunny Forever Fall, and the leaves are created from some very old Basic Grey, perfect for playing along with Basic Grey Challenges Autumn Inspiration.  The Lil Inkers Stitched Rectangle was stamped with My Favourite Things sentiment.


Hey Sunshine, Seize the Curtain & Raid the Craft Supplies...

It's a glorious warm Spring day here today, and what better way to celebrate than with a little Sunflower Sunshine.  Playing along with Curtain Call Sunflower Surprise and this fabulous Seize the Sketch.  Whilst I did not have a specific sunflower stamp, I think this gorgeous gerbera stamp from Uniko Studio fits the bill, stamped in Hero Arts Cup O' Joe on Bo Bunny Forever Fall paper and fussy cut. The background paper is from Fancy Pants Down by the Shore.  I raided my general craft supplies to play along with Moxie Fab World Handmade Cards Week - General Craft Supplies Challenge and incorporated hessian, corrugated cardboard and twine (The Twinery Natural Twine) too!  A mat of Lil Inkers Stitched Rectangles ties in the homemade country theme, and is perfect for playing along with The Twinery You're Sew Fine.


Sunday, September 22, 2013

Freshly Made Craft Dash

9 Minutes and 59 seconds later...
This is about as close to the wire for the 10 Minute Craft Dash as I've been - using my new electronic kitchen timer the beeper started going off just after I finished rounding the last corner! For this Dash, I flipped this weeks versatile Freshly Made Sketch  and found inspiration in the direction of CASology Arrow ;)

First up the strip for the sentiment and the red backing strip were die cut using Paper Smooches Fishtail Flags.  The Fancy Pants Down by the Shore azure wave paper was cut to size. The sentiment flag was stamped with The Alley Way Stamps Life is Short.  Next the Verve Learning to Sail sailing boat was stamped on the grey timber paper, white cardstock, red paper and azure wave paper.  The relevant sections of the stamped sailing boats were fussy cut and adhered to the azure wave paper using a glue pen.  The corners of the azure paper were rounded before it was adhered to the cardstock base. The fishtail flags ends were trimmed and secured together, before being adhered to the cardstock base with foam tape.  Decided at the last minute (literally!) that the cardstock base would look better with rounded corners.

10 Minute Tips:

  • Stick to what you know when Dashing.  Looking back at my Craft Dash cards, I almost always choose die cuts and/or fussy cutting as my "go to".  When you're in a hurry, you usually find whatever your "go to" is already, is it the easiest thing to do FAST.


Friday, September 20, 2013

FUSION... The Perfect Blend


I don't know about you, but this fortnights FUSION graphic keeps giving me flashbacks to the 70s, when Mum & Dad used to have dinner parties created in our lime green kitchen and served coffee made in plungers or percolators, rather than deluxe cappuccino machines!  Will you be inspired by this fabulous sketch, or the fantastic elements in this cool graphic, or will you create a FUSION of both?

Taking the colours and theme from this fortnights funky graphic, I combined my FUSION inspiration graphic with a Clean & Simple Sketch to create this friendship card to play along with Use it Tuesday Friendship Challenge. Talking about flashbacks, the papers are a combination of Echo Park, Kaisercraft (from about 3 years ago) and Basic Grey (from about 7 years ago!), with the coffee girl and sentiment from My Favourite Things, and the coffee cup splatter from Bo Bunny stamped using Hero Arts Cup O' Joe (of course!!!)

Hope to see you at the FUSION Challenge Blog soon, in the meantime, here's some more FABULOUS inspiration from the Design Team...


Playing along in the Basic Grey Anything Goes Challenge too!


Monday, September 16, 2013

Freshly Pinspired Embossing Baby...

Started off playing with this gorgeous Freshly Made Sketch and my Hero Arts New Baby elephant and Baby sentiment to join in the fun at A Blog Named Hero - but somehow a day disappeared this weekend LOL! Lucky for me the CAS on Sunday Oh Baby arrived just in time, so I paired it with this fabulous Pinspired Challenge quilt to create this card.  This gorgeous Fancy Pants Childish check has been my go to paper for baby boys cards - now I'm down to my last scraps of it.  I love that the Lil Inkers Stitched Square mimics the stitching on the elephant and the Craft Concepts Diamond Shadows embossing folder mimics a quilted coverlet, perfect for playing along with Simon Says Stamp Emboss It, and cute buttons perfect for playing along with the Moxie Fab World Handmade Cards Week - General Craft Supplies Challenge, where you can join in the fun too until October 21st!


It's Black & White & A Little Blue...

So this is the card I was working on for the Little Tangles Back to the Blackboard Challenge when I came to many of these conclusions:
"the most effective blackboard cards are those in which the blackboard forms only on part of the card, and/or is used with solid white or bright colours for contrast, that too much black on a card is difficult to photograph, and the messy nature of the chalkboard technique makes it difficult to use on more formal cards."
I've re-photographed my card in more natural (ie daylight) conditions, and I'm happier with how it has turned out, so I thought I'd include this card here too.

I used the same blackboard technique by stamping Neat & Tangled Fresh Blooms and Just Hello in Versamark Watermark ink and heat embossing with Zing White, then taking small amounts of Hero Arts White dye ink on my fingertip and smudging it across the black, to mimic chalky residue. The Fresh Blooms were layered by creating a mask of the largest flower. The chalkboard technique was used on a teal background paper to create Neat & Tangled My Heart Sings bird and Fresh Blooms flower, which were then pop dotted onto the card.


Playing along with Simon Says Stamp Emboss It Challenge and 

Sunday, September 15, 2013

It's Black & White and Read all Over...


It was back when I went to school anyway!!!


In creating a card for Little Tangles Back to the Blackboard Challenge I've come to the conclusion that the most effective blackboard cards are those in which the blackboard forms only on part of the card, and/or is used with solid white or bright colours for contrast, that too much black on a card is difficult to photograph, and the messy nature of the chalkboard technique makes it difficult to use on more formal cards. So with this in mind I created a mini blackboard on my card - and used the technique in conjunction with bright red to help it pop. The blackboard technique was achieved by stamping Neat & Tangled My Heart Sings in Versamark Watermark ink and heat embossing with Zing White, then highlighting the edges of the blackboard section using Hero Arts White dye ink, and taking small amounts of this ink on my fingertip and smudging it across the black, to mimic chalky residue. This technique was also used to create the bird and heart.

Created with a combination of patterned papers from Crate Paper DIY Shop, Cosmo Cricket Little Boys (from back in 2007!!!) and blackboard paper from MME, together with WPlus 9 Label Layers 5 and Lil Inkers Stitched Rectangles die cuts.

All That Glitters...

CONGRATULATIONS Beverly!!!

I'm not quite sure how, but I had it in my head that this challenge ended tomorrow - but alas no, and so I ran out of time to join in the fun at Uniko Studio Sketch Challenge, but still have plenty of time to play along in Moxie Fab Worlds All That Glitters is Gold Challenge.  This Wedding card is created using Uniko Studio Background Builders Round in Circles and All Occasions Sentiments #1 stamped in Versamark Watermark and heat embossed in Whispers Metallic Gold Mirror.  These panels were then die cut using Paper Smooches Fishtail tag die and Dienamics Circle dies, and pop dotted onto the cardstock base.

I don't know about you, but I find the best way to photograph gold on my cards is by using a fill flash - otherwise my lovely gold cards end up looking brown!!


Friday, September 13, 2013

Love and Happiness...

ETA Joining in the fun with Moxie Fab World 
When I looked at the list of supplies for Therese's fabulous MUSE card this week, I discovered I could 99% copy this amazing creation, all I was missing was the brown sugar embossing powder!  As tempting as that was, I thought I'd twist it up a little by incorporating Lawn Fawn Home Sweet Home negative die cut houses, filled with burlap (or hessian as seems to be more common here) and Simon Says Stamp Mini Hearts die cut red felt hearts, together with this sentiment from There She Goes Day or Night, stamped in Cup O' Joe, and pop dotted on a Kraft card base.

Joining in the fun at Lisa's Wanna Sketch,  
Therese's gorgeous MUSE card


Tuesday, September 10, 2013

A Dash across the Lawn...

8 Minutes and 7 seconds later...
with a few of my favourite things...
Die cuts,
Foam tape,
Fussy cutting,
Patterned paper,
Combining Challenges,
Living in the Land Down Under...

So what's a girl to do when Lawnscaping Challenged with using her favourite supplies to create a card?!? Here's what I did!  

First up start the clock for the 10 Minute Craft Dash!  Then adhere a piece of brown Fancy Pants paper to cardstock before stamping this gorgeous Lawn Fawn Critters Down Under roo & kanga, once onto the brown and once onto the teal Childish papers, then fussy cut the images (see the first 10 Minute Tip below on how to save time when fussy cutting). Next up die cut Lawn Fawn Quinn's ABCs - the BEST thing about Lawn Fawn alphabets is that they come with ALL the letters - which means that "baby" was cut in one pass through the machine! Cut the Fancy Pants Childish check paper to size and adhere to the cardstock base. Position and adhere the die cut "baby" and stamp the "welcome" sentiment in Cup O Joe ink (another favourite!) Pop dot the roo & kanga, and stop the clock!

I interpreted the gorgeous overlapping hearts from Lisa's Wanna Sketch as the baby and mama roo - 'cause you can't get much more overlapping hearts than that!

10 Minute Tips...

  • When fussy cutting overlapping images, first cut the top layer image edges that overlap (in this case the back of the roos head around to his nose) before adhering to the bottom layer image, then you can cut the common outline (in this case the front of the roos head) with the two pieces already glued together so you only need to cut the outline once.
  • Choose a die cut alphabet which has ALL the letters -  the b and the q, the d and the p, the n and the u - which means that you can die cut words such as "baby" in a single pass through the machine!
  • I find glue pens are the easiest adhesives to use for smaller fiddly pieces - especially when you are in a rush!
  • Grid or check background paper makes aligning stamping & die cuts a breeze! 


Also playing along with Simon Says Stamp Animal Antics!

Monday, September 9, 2013

You Can Always Count on Me...

9 minutes and 12 seconds later...
Following the theme of The Pink Elephants #215 Numbers Challenge, here's a post full of them!!!  

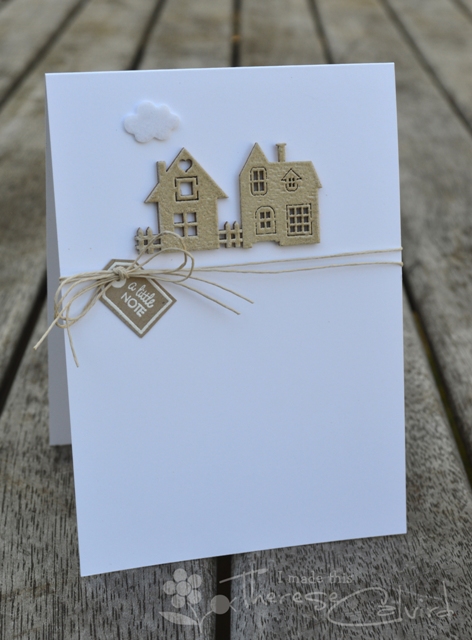
My card for today features... you guessed it - NUMBERS!  For the 
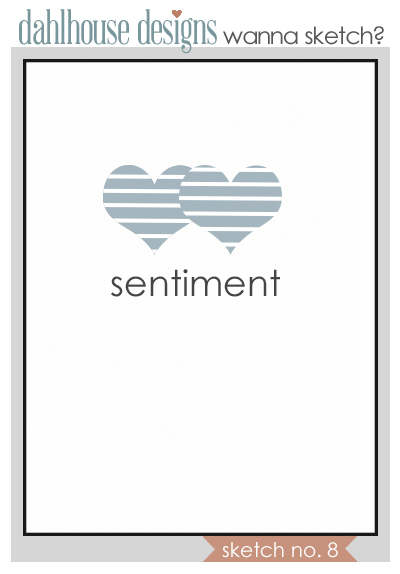
10 Minute Craft Dash #25, this card was based on Clean & Simple Sketch #256, it took 9 minutes and 12 seconds to diecut six Dienamics numbers (this was my first attempt, I cut a second sheet as the one went a bit wobbly on this one, but then mucked up the stamping, so came back to this one LOL!), stamp two Hero Arts background numbers stamps in Stampin' Up Daffodil Delight (see previous explanation ;)) and one Simon Says Stamp "You can always count on me" sentiment in Hero Arts Cup 'O Joe, cut and adhere two pieces of Fancy Pants Child's Play patterned papers, with 4 strips of double-sided tape and 7 pieces of foam pop tape.  I realised after I had pop-dotted that in my rush I had forgotten to round the corners - I think it gives it a more polished finish, but cest la vie!  I LOVE this 10 Minute Craft Dash colour combo, so hope to revisit it later this week using Lawn Fawn stamps ;)

All this talk of numbers brings me to this FABULOUS Month in Numbers idea from Julie Kirk...

How did I get here?  Well may you ask!  And who am I not to answer?

Whilst skimming the internet for some inspiration for the first FUSION challenge for September, I discovered this fabulous blog post on Five Ideas for Scrapbooking with Pages from Old Books, which had in turn been sourced from Julie Kirk's blogspot Notesonpaper.

Intrigued with her Month in Numbers post, I thought wow, I've moved interstate since I started school - I wonder how many kilometres it is between where I first started school and where I am now.  And then it dawned on me, although I did most of my schooling in Australia, I actually first started school in Belmont Massachusetts (and yes I did have to look up to see how that was spelled correctly LOL!), we moved to the USA from Australia as my Dad was offered a position at M.I.T., and we stayed there for almost two years, til just before my baby brother was born. Co-incidentally I have lived in Belmont in Australia too (but that's a whole other story!)

So from Massachusetts to Melbourne is 17014.421 km and I'd have to say - you've come a long way baby!!!