Friday, May 31, 2013

Hello Lil' Sunshine...


First I have to say a HUGE Thank You to Laura at Lil' Inker Designs for re-sending my order when it looked like it was lost somewhere en-route from USA to Australia.  It turns out that my parcel ended up going via Frankfurt, Germany - I think it was on it's way to Austria, in a two month round the world trip - how I wish I could have been in that parcel!!!  Then one day later my replacement package arrived in record time, just over 1 week - and this package is now on it's way back to Laura with my sincerest gratitude & thanks for FANTASTIC customer service!

Luckily my parcel arrived in perfect time for the fab new Lil' Inker Designs Sunny Days Challenge Hop, to be inspired by this cool series of photos...
 
So my card is 100% Lil' Inker Designs die cuts - from the gorgeous sun, rainbow and vellum clouds (I LOVED how well these dies cut into the vellum), to the stitched polaroid frame and rectangle, paired with this gorgeous Lil' Inker Designs Hello sentiment, created using a combination of Fancy Pants Park Bench and Echo Park papers. The fancy button is from the Fancy Pants Park Bench Collection too.  If you hurry you can still join in the Lil' Inker Designs Sunny Days Challenge Hop, until 11:30pm Sunday June 2nd and be in the running to win some FAB Lil' Inker prizes!

Hope you are having a Sunny Day in your corner of the world!

and with this FAB colour combo, joining in the fun at Inspired By too

Playing along with Catered Crops Mellow Yellow Challenge too, thanks Sian!!

Monday, May 27, 2013

Paper Crafts 2013 Gallery Idol...


If you haven't had a chance yet, go take a look at the Paper Crafts 2013 Gallery Idol cards - some fantastic inspiration for Kids & Teen Birthday cards - and I'm glad I'm not a judge!!!

I broke out the neon paints, black sparkle embossing powder and sequins to create this teen birthday card as my third and final entry.  The fabulous thing about kids neon paint is that it looks fantastic in real life, but it is difficult to photograph - especially at night when you want to highlight the black sparkle embossing too!

I painted the background in watercolour neon paint, once this layer was dry I stamped my sentiment in Versamark Watermark and Whispers Black Sparkle embossing powder, using a combination of stamps from Mama Elephant and Technique Tuesday.  The wooden Basic Grey totally and Studio Calico heart embellishments were painted in neon hot pink and coated with Dimensional Magic.  The wooden Kaisercraft funky girl was covered with Versamark Watermark and then dipped in the Whispers Black Sparkle embossing powder and heat set.  All the wooden embellishments and sequins were adhered with Helmar 450 to ensure they don't fall off!


PS. If you're inspired by the neon trend, why don't you join in Let's Get Trendy Now! 3... 

Sunday, May 26, 2013

Annabelle's Idol...

Time to make a birthday card for my nephew, or should I say one of my nine nephews!  So I thought I'd take the opportunity to join in Paper Crafts 2013 Gallery Idol too as the theme first up is Birthday Cards for Kids / Teens.  I've been wanting to ink up this little guy from Annabelle Stamps for ages, so I'm playing along with this fortnights Annabelle Stamps Sketch Challenge too.  

The background was created using Distress Inks Spiced Marmalade and Wild Honey, oversprayed with Glimmermist Gold.  I paper-pieced my friendly Annabelle Stamps Lil Monster using cardstock and My Mind's Eye papers, hand drew the balloon end and string, added some Studio Calico flair for my cute little balloon, stamped the Annabelle Stamps sentiment, then ran the bottom two-thirds of my cardstock with a Lifestyle Craft Chevron embossing folder and added some MME Enamel Dots, before I pop dotted my cardstock layer, and the Lil Monsters eyes!

Remember - there is a FAB Clearance Sale over at Annabelle Stamps if you hurry, and you have until Monday night to link up to three cards in 2013 Gallery Idol Birthday Cards for Kids / Teens.


Saturday, May 25, 2013

FUSION A Little Tangled...

I can't wait to see what this weeks FUSION Hypothesis brings - will you be inspired by this FAB sketch, or this gorgeous photo - or BOTH?!?   Be inspired by the gorgeous flowers or glass vase, the fantastic bright colours, the watercolour techniques, or clear elements...

This week I was drawn by the gorgeous colours and the floral subject, and the inclusion of watercolour and clear elements.  I created my flowers by stamping Neat & Tangled blooms in Versamark Watermark and embossing with clear powder before adding using Dylusions Lemon Zest, Squeezed Orange and Bubblegum Pink, oversprayed with Glimmermist Twinkle Yellow, before adding some gorgeous clear sequins centres.  Papers are from American Crafts, Amy Tangerine collection featuring watercolour effects, and reflecting the clear element in the photo using a Hambly grid overlay.  The sketch this week is slightly altered as I chose to create a square card, with the sentiment moved from below the circle to within the circle.  This gorgeous sentiment is also from Neat & Tangled.

Drop by FUSION to check out the Gallery 
and some more FANTASTIC inspiration from the Design Team
I can't wait to see what you create!

Playing along with this fortnights Little Tangles Embellish It Challenge too.

Friday, May 24, 2013

A Little Tangled & Embellished


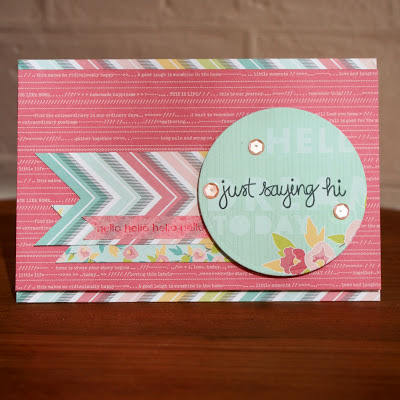
I thought I'd alter some washi from my stash to add to this fortnights Little Tangles Embellish It Challenge, so I used my Hello sentiment from On the Strip stamped in StazOn White Cotton over some pink floral washi, to match my papers from American Crafts Dear Lizzy, 5th & Frolic. Stamped the Neat & Tangled Just Saying Hi sentiment in Momento Black ink and highlighted with a few of the fabulous sequins which arrived in a little bag with my order.

I'll be back soon with another card featuring Neat & Tangled for the next FUSION Challenge starting on Friday noon EST (USA) which is around 2am Saturday morning here!  Can't wait to see you there!

Saturday, May 18, 2013

Another Awesome FUSION...

Another FABulous week of inspiration in the FUSION gallery and 
a huge THANK YOU to everyone who is playing along! 
I hope you are having as much fun as we are!!!


I can't wait to see what this weeks FUSION Hypothesis brings - will you be inspired by this FAB sketch, or this gorgeous photo - or BOTH?!?   Be inspired by the gorgeous textures or fibers, the neutral colours with a POP of bright, the twigs or flowers, the tag or fabric...

This week I was drawn by the gorgeous white painted wood background - I've been hording a scrap piece of this paper for a special occasion!!!  Luckily I was able to stretch my scraps by cutting my piece in two and adding a pop-dotted strip of this neutral spotted paper (another horded scrap!) to fill the space in between.  The kraft die-cut branch was left over from this earlier card-making effort.  I created my butterfly by swiping a scrap of watercolour paper with Wild Honey Distress Ink, before spritzing with Glimmermist Gold, heat setting and then die cutting my butterfly, and adding a few Kaisercraft gems.  The sentiment is created using a combination of Ali Edwards Technique Tuesday "You are", Basic Grey wood veneer "awesome" and WPlus9 "today and always".

Drop by FUSION to check out the Gallery 
and some more FANTASTIC inspiration from the Design Team
I can't wait to see what you create!


Stamping on patterned paper to join in the fun with CASual Fridays Stamp on DP
I thought I'd set myself an EXTRA Challenge and create my card from scraps, 
perfect for playing along with Shopping Our Stash Scrap Attack!
Having fun with Southern Girls Challenge Spotty Dots

This made me smile...

Wednesday, May 15, 2013

A Courageous Dash...

8 Minutes and 57 seconds later...


This fortnights 10 Minute Craft Dash colours would be just PERFECT for a baby card - and guess what Paulina has as a fab prize - you guessed it, Little One, the newest, sweetest baby stamp set from Precious Remembrance Shop.

I remembered this week why die cuts are just perfect for the 10 Minute Craft Dash with this card (and its 7 die cut pieces!) being created in 8 minutes and 57 seconds, using a combination of Websters and Basic Grey papers and a sentiment from Verve, on a base of corrugated card I have had in my stash for a while!!!

Just thought I'd add a couple more 10 Minute Craft Dash tips here too:
  • I often use a pre-made 6 x 4 inch white cardstock base for the card - even if I add another colour on top whilst the stopwatch is ticking, I know exactly what size I need to cut it - and every second saved counts! 
  • I always make sure I have a clear idea/sketch to use for my card, including what colours I think I will use where. 
  • If I am using die cuts, I cut all the same coloured shapes in one pass through the die cutting machine - then add the next coloured sheet of paper and cut all those shapes in one pass etc (kind of like an assembly line!) and make sure I keep a safety pin handy to help remove the coloured paper from the die cuts quickly.
  • When I use foam to pop dot on my Dash cards I use the foam tape on a roll and peel off the backing BEFORE I cut it so that I can whack the tape straight onto my card and don't have to fiddle to remove the backing tape afterwards. 
I'd LOVE to see what you can create for the 10 Minute Craft Dash - just head over to Pretty Pink Posh and link up your creations there, and don't forget to check out the other FAB creations from the Design Team!


Tuesday, May 14, 2013

CAS(E) of CASual Gift Packaging...


I combined the current MoxieFab 350 Cards & Gifts - The Gift Packaging Challenge with this weeks cool CAS(E) this SketchCASual Fridays Top 10 Tic Tac Toe - Birthday, Bling & Punches or Dies and Color Combos Galore #243 and created this decorated ear-ring holder and birthday card in one.  I used a Dienamics label die to create the earring holder.  I first die-cut a piece of cardstock covered with chevron Websters paper on the front and back.  This was then folded into a triangle for the front, base and back of the ear-ring holder, I pierced two small holes through which the ear-rings were secured.  Larger holes were punched in the top of the front and back of the holder and the tassel secured (tucked inside the holder in the photo).  Lastly I added the flower decoration, cut from re-cycled from Simple Stories packaging, and adhered the ear-ring holder to the front of the card. I think those ear-rings count as bling - don't you!!!


Saturday, May 11, 2013

You're My InFUSION...

Over 50 gorgeous FUSION cards in the gallery again last week!  I can't wait to see what this week brings - be inspired by this fab sketch or graphic or both!  Will you be inspired by the colours, the patterns, the cups, the calendar, or even that funky little bird?!

I'll be the first to admit that I struggled with the colour combo this week - I have realised that given the choice I pick cooler (blue-based) colours over warmer (yellow-based) colours - but hey, that's why it's called a Challenge right!!  I thought this weeks FUSION Challenge photo was the perfect time to have a play with my Skipping Stones Design coffee cup and "Happy Birthday (a little latte)" sentiment, inked in Cup O Joe - of course!  I chose a range of patterned papers from Studio Calico and MME, in graphic checks, spots and even little hearts.

I hope you get a chance to stop by and grab some inspiration from the rest of the Design Team - and experiment with FUSION today!


Monday, May 6, 2013

A Dashing His & Hers...

I'm so very far behind on my His & Hers Online Card Classes homework from last week, that having already created this card for this fortnights 10 Minute Craft Dash, I thought I'd try a "His" version of the same card.  Using the same layout and sentiment stamp, but substituting more masculine papers and elements - replacing spots with weathered wood, gingham with a starry night sky, a blossom branch with a twig die-cut and a plump coral birdie with a more svelte red one.  This red & white birdie combo reminds me of Christmas, and I'm playing along with Festive Fridays Element Challenge.  Thought I'd play along with Dream Valley Challenges No Squares Allowed - with not a square in sight - just LOTS of rectangles!

Here are the "Hers" & "His" cards side-by-side for comparison:


Many thanks for stopping by, much appreciated
You can now follow me by clicking on the "Blog Lovin" button!


Saturday, May 4, 2013

A Little 3D FUSION...


Another fantastic gallery at the FUSION Challenge last week - and looking forward to seeing your experiments for this weeks challenge!  Will you use just Jackie's Sketch Challenge, or just Lesley's Photo Challenge, or be brave and create a FUSION of the two?

As a Fusion Scientist I have combined both sketch and photo inspiration to create my card.  As soon as I saw this gorgeous aqua birdcage as the table centrepiece, I knew I wanted to try and re-create a 3D birdcage, using a technique similar to that which I used on this heart card (see photo below).  I used this gorgeous MME patterned paper behind the birdcage to pick up the colours from the photo and to reflect the layers in the sketch.  Using My Favorite Things die-cut I cut 6 birdcage shapes, one full die-cut for the base and 5 for the folded layers.  Using scissors, I cut and removed the top loop and the internal "wires" from 5 of the birdcages, and then folded each birdcage in half vertically.  With the complete birdcage die-cut as the base, I attached the frames of the birdcages to each other using a glue pen.  The best thing about this is that the birdcage still folds flat if you want to post it - then can be popped back to 3D when removed from the envelope!

I had such fun creating my watercolour Neat & Tangled bird last week, that I recreated one in aqua and coral this week, to play along with Little Tangles Pick Two (Yellow, Aqua, Coral) Challenge and Moxie Fab The Wonder of Watercolour Challenge too.  With this gorgeous sentiment from Paper Smooches, I am also playing along with Simon Says Stamp Happy Mail Challenge and Paper Smooches Sparks Anything Goes Challenge too.

With this gorgeous sentiment from Paper Smooches, I am also playing along with Simon Says Stamp Happy Mail Challenge and Paper Smooches Sparks Anything Goes Challenge too.

Head over to FUSION to see more fab inspiration from the Design Team - 
I can't wait to see what you create!
Allyson  Anderson  / Amy Tsuruta / Deanna Jean / Kelly Griglione / Stacey Schafer
3D birdcage inspired by my earlier card

A-MUSE-ing Equation...


Jen's gorgeous MUSE card
There are so many elements I LOVE on Jen's MUSE card that I couldn't resist playing along this week!  And as I love combining challenges, I couldn't resist adding a few more challenges into the mix too.

I love Jen's layout, the butterfly element and the teal and yellow combo, to which I added some orange for extra zest.  Jen's combination of the maths washi tape and teal twine section reminded me of an equation - so what better sentiment to pair with my teal equation washi tape with than "We equate".  The sentiment was created using Paper Smooches Spring Groves "We" from "Welcome Spring", and die cut Wise Dies alphabet, perfect for playing along with this weeks Paper Smooches Sparks Anything Goes Challenge.  I love the embossed background, perfect for playing along with this weeks Catered Crop Make an Impression Challenge, and the washi tape, perfect for this weeks The Pink Elephant Washi Tape Challenge too.

Thanks so much for stopping by - hope you have a FABULOUS weekend, 
and National Scrapbooking Day!

This made me smile!!!

Wednesday, May 1, 2013

(Spring) Time to Dash...

I do hope you get a spare 10 minutes to do the Dash this fortnight - I love seeing everyone's creations in the 10 Minute Craft Dash gallery - and with aqua in the mix this week I am particularly looking forward to it!  Check out the inspiration from the Design Team too - very delish!!!

This week I couldn't resist incorporating this gorgeous die-cut birdie and sentiment from this fortnights sponsor, WPlus9 Design Studios.  To save on time, I started this challenge using a pre-made 4x6 inch card in white cardstock.  My branch was a die-cut element from Crate Paper, but I decided to make life more challenging and fussy cut the cream border away from the die-cut, thus eating up 3 minutes of my 10 Minute Dash!  Background patterned papers are from MME, originally I had planned to craft cut the window shape from my coral patterned paper to revel the aqua gingham, but as luck would have it, the piece I cut away from my 6x6 base was exactly the right width to use behind the window frame, and much less risky than trying to use a craft knife in a hurry LOL!  My first attempt at stamping my window frame die-cut went wobbly, so I die-cut a new frame and re-stamped it - my back-up option if I messed up my second attempt was to use my window frame in reverse - but it was second time lucky!  I layered my aqua gingham, coral spots and aqua gingham papers using double-sided tape, then pop-dotted my kraft window frame over the aqua gingham.  Then I used my glue pen to adhere one end of my branch to the coral paper, and placed the other end of my branch over the window frame before pop dotting my die cut birdie inside the window.  I love the extra texture created by not fully securing the branch to my card - and it saved on time too, 9 minutes and 21 seconds from start to end!

With this FAB prize up for grabs from WPlus9 Design Studio, 
I'd love to see what you can create in the 10 Minute Craft Dash this fortnight!